
Views: 0 Author: Site Editor Publish Time: 2026-11-09 Origin: Site


Unplanned downtime in PET preform production drains profitability fast. Every minute a machine stops due to tool failure hurts your bottom line. However, treating tool health as a long-term investment changes this dynamic entirely. We must distinguish between routine preventive maintenance and critical component replacement. They require entirely different operational strategies. Routine daily care keeps machines running. Critical component replacement, conversely, demands calculated timing to protect your overall production health. You need a reliable framework to maximize your return on investment. We will explore how to manage this balance effectively. You will learn a precise decision-making process to optimize tool life. We will also cover how to maintain strict product quality standards consistently over millions of cycles. This guide helps you shift from reactive, stressful fixes to highly proactive asset management. Prepare to elevate your production floor efficiency today.
You cannot manage what you do not measure. Cycle counters provide the most accurate baseline for tool health. Time-based schedules often mislead maintenance teams. A machine running continuously degrades faster than one running intermittently. Thermal stress logs also provide vital clues. You should track temperature fluctuations across different cavitation zones. Sudden temperature spikes often indicate cooling channel blockages. These blockages accelerate metal fatigue rapidly. Establish clear wear-and-tear thresholds early. Compare your current metrics against original equipment manufacturer specifications regularly.
Cores and cavities endure immense thermal stress during every injection cycle. You must monitor them for early signs of thermal degradation. Microscopic cracks often appear near the gate area first. These stress fractures compromise blow-molding consistency downstream. Surface pitting is another major red flag. Acidic off-gassing from certain resins causes this pitting. Degraded surfaces create friction during part ejection. This friction leads to visible scuff marks on your preforms. You must replace pitted cavities promptly to maintain optical clarity.
The neck ring thread area experiences extremely high friction. Mechanical ejection forces constantly stress these precise components. Thread dimensions dictate the final bottle closure seal. Even minor precision loss causes severe downstream leakage. Localized repair usually fails in these high-tolerance zones. Attempting to weld and re-machine a neck ring rarely restores its original geometry. You should justify full set replacement when threads show visible flattening. Protecting your closure seal integrity outweighs the short-term savings of patching rings.
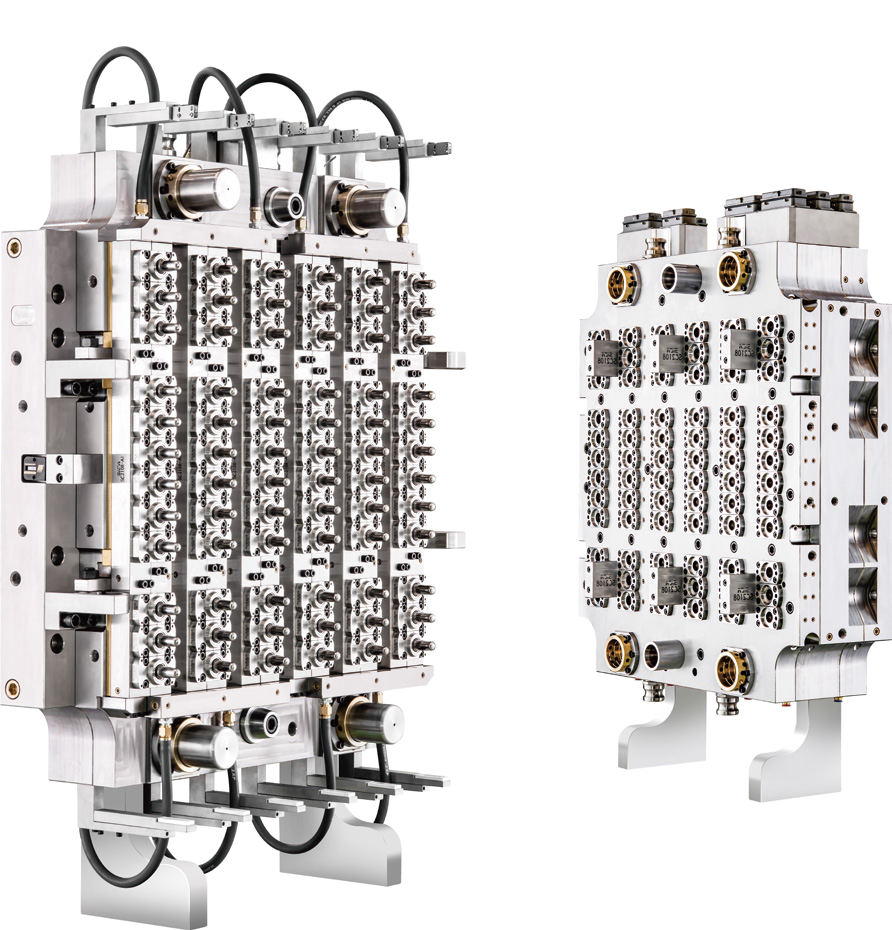
Different resin grades profoundly impact component lifespans. Recycled PET (rPET) contains impurities and varied molecular weights. These variables accelerate wear across specific tooling areas. Flakes and contaminants act like abrasive sandpaper. You will notice faster degradation when running 100% rPET. Virgin PET flows much smoother. It causes significantly less abrasion on cavity walls. Every PET Preform Mold requires a tailored maintenance interval. You must adjust your inspection schedules based on the specific resin blend running.
Your operators must perform basic checks every single shift. Cooling water flow demands immediate attention. Inconsistent cooling causes warped preforms instantly. Operators should verify lubrication distribution across all moving plates. Dry plates cause catastrophic galling and expensive seizures. Visual inspections remain incredibly important. Check the parting lines for early signs of flash. Inspect the gate vestige for stringing or short shots. These daily routines prevent minor issues from becoming major production stoppages.
Deep cleaning requires specialized methods to protect steel surfaces. Ultrasonic cleaning effectively removes stubborn gas buildup. It penetrates deep into complex cooling channels seamlessly. Dry ice blasting offers another excellent cleaning alternative. It removes surface residue without inducing mechanical erosion. Never use abrasive wire brushes on polished cavity surfaces. You will destroy the optical finish immediately. Regular deep cleans maintain optimal heat transfer efficiency. This efficiency keeps your cycle times consistently fast.
A rigorous inspection framework separates average shops from world-class operations. You must utilize strict measurement protocols. Visual checks alone cannot guarantee part compliance.
Standard Maintenance Inspection Intervals
| Frequency | Component Area | Action Required | Methodology |
|---|---|---|---|
| Daily | Cooling System | Check flow rates and temperatures | Visual monitor / Flow meters |
| Weekly | Parting Lines | Inspect for flash and clean vents | Solvent wipe / Visual gauge |
| Monthly | Neck Rings | Verify thread dimensions | Calibrated GO/NO-GO gauges |
| Quarterly | Cores & Cavities | Deep clean and inspect for pitting | Ultrasonic bath / Microscope |
Memory fails, but proper documentation persists. Maintaining a digital logbook transforms your maintenance strategy completely. You must record every single action accurately.
Predictive planning prevents unexpected downtime. It ensures you order spare parts exactly when needed.
Do not replace parts prematurely. You must distinguish between process-related errors and actual mechanical failure. Processing parameters frequently mimic tool damage. High barrel temperatures often cause excessive flash. Low holding pressures usually create short shots. You should always verify your processing sheets first. Check the melt temperature and injection speed. Ensure your chiller delivers consistent water pressure. Once you rule out processing variables, you can confidently investigate mechanical issues. This diagnostic discipline saves thousands of dollars.
Certain defects point directly to specific mechanical failures. Thread damage requires careful analysis. You must identify whether it stems from excessive natural wear. Sometimes improper clamping force crushes the threads instead. Short shots and density variations tell another story. Determine if the issue is cavitation-specific. A blocked gate in one cavity causes a localized short shot. However, upstream material supply issues affect the entire shot globally. Pay close attention to preform concentricity. Core shift usually indicates worn taper locks.
Operators frequently face the repair-versus-replace dilemma. You need a logical matrix to guide these decisions. High-precision parts rarely benefit from patching. Attempting to weld and regrind a damaged core introduces immense operational risk. The heat from welding alters the steel metallurgy locally. This creates uneven cooling spots during production. Refurbishing non-critical components makes sense occasionally. However, you should avoid patching parts directly contacting the plastic melt. The risk of producing non-conforming preforms outweighs any temporary savings.
You must evaluate quality risk strictly. Neck rings define the closure interface entirely. They possess extreme tolerance sensitivity. Replacing neck rings is nearly always more cost-effective than re-machining them. A re-machined ring often deviates by a few microns. This microscopic deviation prevents bottles from sealing properly. The resulting downstream customer complaints cost far more than new components. Protect your brand reputation by installing fresh, factory-certified rings. Do not gamble on compromised threads.
Supply chain delays ruin production schedules quickly. Custom core and cavity manufacturing requires significant lead time. You cannot simply buy these precision components overnight. Effective managers plan these purchases months in advance. Monitor your cycle counts diligently. Trigger procurement protocols before components reach their failure thresholds. You must ensure production continuity seamlessly. However, avoid over-investing in massive spare inventory. Keep critical wear items like neck rings and gate inserts stocked. Order larger cavities based strictly on predictive data.
Your tooling partners dictate your ultimate success. Demand stringent documentation from any vendor you choose. You need certified proof of material hardness. Insist on reports showing HRC specifications for all steel blocks. Soft steel degrades rapidly under high injection pressures. Evaluate their coating specifications carefully. PVD (Physical Vapor Deposition) and DLC (Diamond-Like Carbon) coatings extend part life dramatically. These coatings reduce friction during ejection. Finally, demand absolute precision tolerances. Vendors must provide coordinate measuring machine (CMM) reports verifying every dimension.
Long-term tooling performance relies heavily on consistent data logging. Preventative action always beats reactive firefighting. You must commit to rigorous daily, weekly, and monthly inspections. This consistency prevents minor wear from escalating into catastrophic failure. We constantly balance necessary maintenance investments against desired production uptime. Strategic replacements ultimately guarantee higher overall output. They eliminate the scrap and frustration caused by degraded components. Review your current cycle counts today. Compare them directly against OEM recommendations. Establish a proactive, documentation-first culture on your floor to secure your profitability.
A: The three most critical signs include severe thread inconsistencies, persistent cooling inefficiency, and continuous flash. Thread damage compromises bottle sealing instantly. Cooling issues cause warped preforms and extend cycle times. Persistent flash usually indicates parting line damage or worn interlocks that require immediate part replacement.
A: You should conduct a full dimensional audit monthly for high-volume production cycles. Continuous high-speed running accelerates mechanical wear on threads. Use calibrated gauges to measure these profiles carefully. Catching micron-level deviations early prevents massive downstream bottle leakage and protects your customer relationships.
A: Yes. Recycled PET contains impurities and varied molecular structures. These elements act abrasively against steel surfaces. This abrasive nature accelerates wear significantly compared to virgin resin. You must shorten your maintenance intervals and inspect for cavity pitting much more frequently when running rPET blends.
A: Surface coatings like PVD or DLC drastically extend component life. They increase surface hardness and resist acidic off-gassing from resins. Furthermore, they provide exceptional release properties. This reduces ejection friction, prevents preform scuffing, and allows for slightly faster overall cycle times.
A: Proper alignment ensures even stress distribution across all components. Misalignment forces the neck rings to absorb unnatural lateral pressures during clamping. This unequal stress crushes threads prematurely and destroys precision tolerances rapidly. Maintaining perfect parting line alignment is vital for maximizing neck ring lifespan.


